Peanuts
BackPeanuts are an easy crop to grow at home during the warmer months, and being a bit of a novelty, they’re also a great way to encourage kids (and our non-gardening partners) to get into the veggie patch. They’re delicious to eat raw, roasted or even boiled so the foodies amongst us will have a ball experimenting with them in the kitchen as well.
One thing to note is that peanuts are not true nuts but are actually in the pea or legume family. Like all legumes the seeds are produced in pods but the quirky thing about peanuts is that these pods develop underground out of view. See peanuts are actually pretty cool
How To Grow Peanuts
Peanuts thrive in warm to hot conditions and need at least 4-5 months of daytime temperatures above 18°C to successfully produce a crop. The growing season is spring to autumn in most areas, but in the tropics it’s the dry season (late autumn to winter) that offers the best conditions for successful growing.
As they form a small leafy bush about 30cm tall and 50cm wide they don’t need a lot of space. This gives great flexibility in how you plant them eg in blocks, on the borders of garden beds, in single rows between other crops or just squeezed in anywhere you have some space. Peanuts can also be grown in pots on a balcony and make an attractive container plant with their soft leaves and dainty yellow pea flowers.

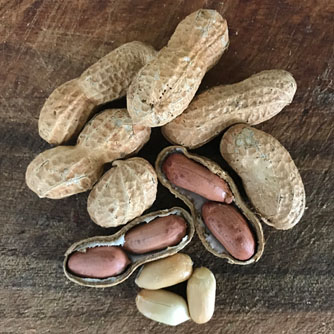
Tasty home grown peanuts
Choose a sunny spot that’s protected from strong winds and has acidic soil (5.5-6.5 pH). Apply lime or dolomite if you soil is too acidic. Soil should also be well-drained and friable. To prepare the soil for planting, loosen it first with a garden fork then run a steel rake over the surface to break up any large clumps. With heavy clay soils shape it into mounded rows to increase drainage and apply gypsum to help improve soil structure. This will also boost calcium which is needed for a healthy crop. Lastly you can also spread a 3cm layer of compost over the surface to act as a mulch and provide a loose friable medium for peanut pods to develop.
For container growing choose large pots 30cm wide or more. Peanut plants look great in glazed or terracotta pots, but remember porous terracotta pots dry out quickly so consider sealing the inside of these pots first. Black plastic pots absorb more heat which makes them a good option in cooler, marginal growing areas. Fill containers with premium potting mix that has had some organic fertiliser pellets or animal manure mixed in.
Sow the seed direct in the soil or potting mix 3cm deep and 30cm apart. Water in well with OCP eco-seaweed and then allow the soil to just dry out before rewetting it. Constant moist conditions can cause the seed to rot. The seeds can take about two weeks to germinate so be patient.
Sowing Guide for Peanuts
| Growing Zone | Sowing Time |
| Cool Zones | Not suitable |
| Mediterranean Zones | Spring, Summer (early) |
| Warm & Temperate Frost Free Zones | Spring, Summer (early) |
| Subtropical Zones | Autumn (late), Winter |
Note: Peanut seedlings are rarely available so you’ll need to get started by seed. A quick and easy way to obtain seed is to buy fresh raw peanuts from a health or bulk food store. They must be unprocessed (not roasted or salted) and still in their shell. You will need to remove the shell before planting but keep the skins intact.
Alternatively you can sometimes get peanuts from online seed suppliers. Some sellers provide an inoculant which introduces specific soil bacterium better allowing peanuts to fix and utilise atmospheric nitrogen. It’s not entirely necessary when growing peanuts in the home garden but it can result in improved plant vigour and yields.

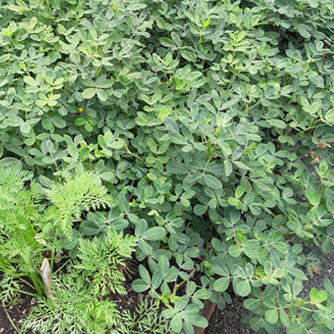
Peanut plants sharing the veggie patch with some carrots at the front
Fertilising and Maintaining Peanuts
Once peanut seeds germinate, the plants grow rapidly forming a bushy ground cover which helps to reduce competition from weeds. Water plants deeply and regularly to support their rapid development. They may need a daily soaking in hot weather. To encourage strong healthy plants and better-quality peanuts, apply OCP eco-aminogro and OCP eco-seaweed every 2-3 weeks.
Plants will start flowering after six weeks or so. Pollinated flowers form a spike or ‘peg’ which extends downward and penetrates into the soil. Once in the soil a peanut pod will start to form at the spike tip. Hilling up soil or compost around the spikes will help the process along and encourage greater returns.
Harvesting, Processing and Storing Peanuts
Peanut plants are ready to harvest when they start to yellow (late-summer to autumn in most areas). Use a garden fork to loosen the soil around the plant and then pull up the entire plant. Shake well to release the soil from around the pods and check the soil to see if there are any pods left behind.
It’s important that the pods are dried thoroughly for 3-4 weeks before preparing and storing them. Immediately after pulling up plants, hang them in a warm, dry, well-ventilated spot out of direct sunlight. After a couple of weeks, remove the pods from the plants, clean off any excess soil then arrange them on trays in a single layer to continue drying for another 1-2 weeks. Bring them inside at night where they will be protected from moisture, mice and rats.
Mould can be an issue, especially in wet and humid conditions. Discard any pods and peanuts that look mouldy, discoloured or shrivelled – do not eat these as they can cause health problems. To reduce potential for mould in humid climates, give pods a rapid dry in a dehydrator immediately after harvest until the pods are crisp.
Properly cured and stored peanuts will last for several months. Keep pods in mesh bags hung in a dry, well-ventilated area. Shelled peanuts can be stored in sealed containers and will last longer when placed in the fridge.

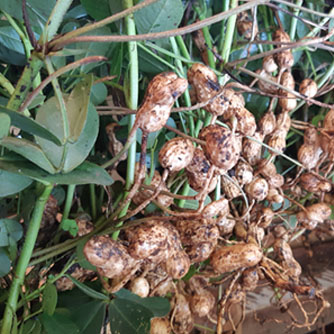
Freshly harvested peanuts ready for drying out
Roasting Peanuts
To roast dried peanuts, lay them in a shallow baking dish and place them in a preheated oven at 180°C. Toss every five minutes until done. Shelled peanuts take 15-20 minutes to roast, unshelled 20-25 minutes. Bake until slightly underdone as they will continue cooking after they’ve been taken out of the oven. Allow to cool for 10 minutes before eating.
Pests and Diseases of Peanuts
Peanuts are often untroubled by pest insects and diseases but stunted growth may be due to parasitic nematodes damaging roots. Lumps on the roots and small lesions on the peanut shell are signs of nematode presence. Treat soils with OCP eco-nemguard.
Be warned that bandicoots, rats and mice like peanuts as much as we do! If these pose a problem in your garden cover the crop with fine gauge wire mesh from flowering through to harvest to restrict their access.


